Syntactic sugar of async await in JavaScript

Syntactic sugar header image

Most advances in modern programming languages, are striving towards making code more human readable. Some people call these features syntactic sugar, because often it doesn’t really change the way the runtime internally handles it.

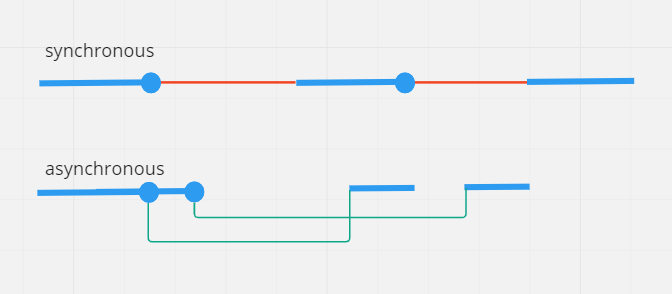
One such feature in JavaScript is async await. Lets first look at the simple diagram, comparing synchronous vs asynchronous calls. Courtesy of Marijn Haverbeke’s amazing book Eloquent JavaScript.

In below diagram, thick blue line is the program running usually and the thin red line represents time spent waiting. As you can see, with asynchronous mode, there is no time spent waiting. hence the primary thread is free to do other things, remains ready for interactivity. It picks up the processing on a future callback e.g. an API call returning a response.

Diagram explaining difference between synchronous and asynchronous timelines

Analogy, lets say you drop your friend to do some shopping. He is going to call you when he is done. If you wait outside doing nothing, waiting for his call, that is stupid(synchronous). If you go do some of your other chores, and when he calls, you go back to pick him up, that is smart(asynchronous).


So, asynchronous is good, how to do it in JS, two prominent ways are promises and async await

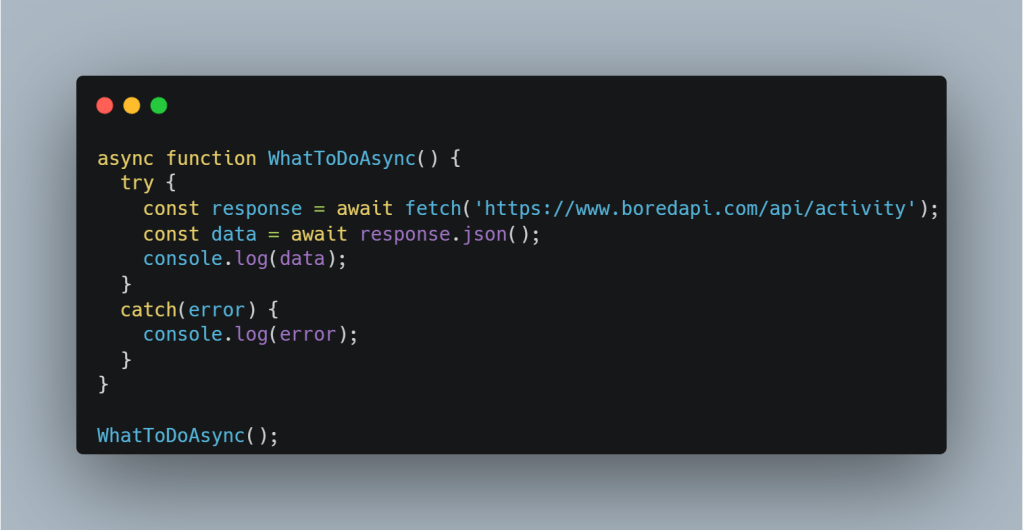
Enough english and images, lets see the code. Where the same API call is done both ways. API returns a response and then its converted to JSON, both return a promise.

async await code sample

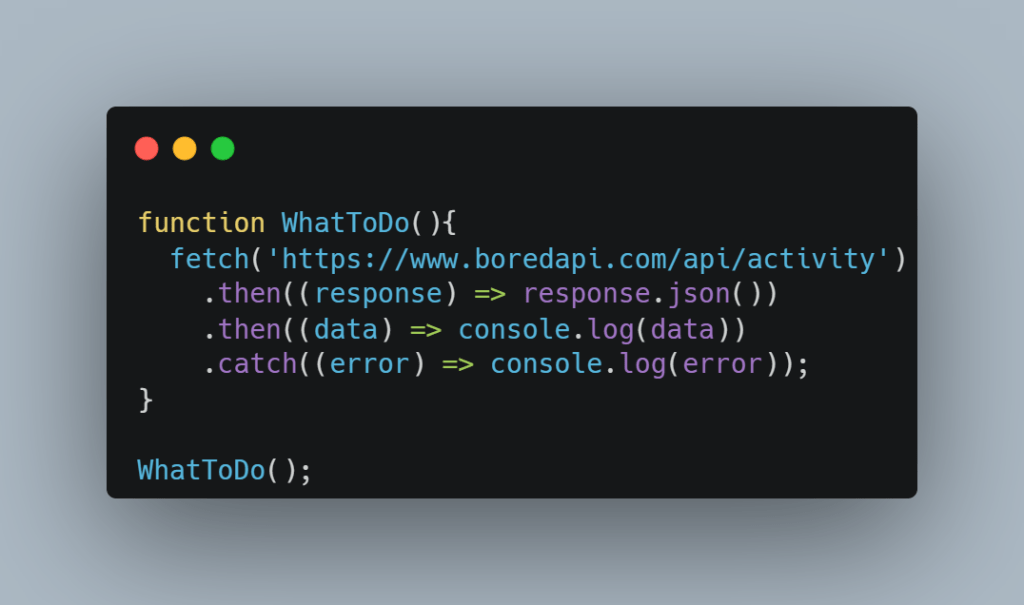
In case you are wondering that’s a real API, and you can see these examples in action at this jsfiddle

You might say, its not making any difference to number of lines of code, but the point is readability. In this contrived example may not seem much but in many real world applications, promises are chained at much deeper level causing readability hell.

Now, go fix some bugs!

Using emojis to understand JS Spread and Destructuring

This is in a quest to explain things to a five-year-old(myself). And what better way than to have some pictures than text.

Spread (…)

Prefixing an array, string, or an object with spread(...) when calling a function or as part of an assignment will expand the array elements, in case of object into key-value pairs.

Array example

Object example

Destructuring

Destructuring isn’t really related or similar to spread but just an easy way of extracting values from arrays and objects into variables.

Array example

Object example

There are so many different ways you can use destructuring, but the information is better retained if it is gathered in steps. I hope this is a simpler start for getting your head around these concepts.

Now, go fix some bugs! 

Semantic Clothing

It’s really about semantic HTML, sorry for the confusion. Confusion though is the keyword of this article. Imagine you walk into a clothing store, and sections are marked as head garments instead of hats, shirts are called upper-body garment, pants are called leg garments and socks are called feet garments, essentially everything is a garment. Very confusing indeed.

Now, if your HTML code looks something like below, you are creating a similar confusion for the browsers or any client trying to parse your html.

<div class="header"></div>
<div class="nav"></div>
<div class="section"></div>
<div class="main">
    <div class="post"></div>
    <div class="post"></div>
</div>
<div class="sidebar"></div>
<div class="footer"></div>

Instead it should look like…

<header></header>
<nav></nav>
<section></section>
<main>
  <article></article>
  <article></article>
</main>
<aside></aside>
<footer></footer>

Few reasons why you should do it…

  • Search engines and screen readers have easier time reading it
  • Just by making it easier to read the code, improves the maintainability of it

Check out many more here

Checkout the full list of html elements you can use here

Kony Studio Microsoft Team Foundation Server Integration

This is tested with Kony Enterprise Studio 7.0.1 and TFS Server 2012.

Kony studio is based on Eclipse, so, everything one would do to achieve this for Eclipse should apply to Kony studio as well.

First step is to get the TFS plugin installed for Kony, and like mentioned, this is no different from how it’s done for Eclipse. Simply follow this link http://bit.ly/konytfs to install it.

Once done, open your project go to menu Window>>Show View>>Project Explorer you will see below window

ProjectExplorer

Right click on root folder Team>>Share Project link and follow the wizard…

  1. Plug-in selectorSCSelection-1
  2. TFS URLServerURL-2
  3. Server selectionProjectSelection-3
  4. Server project location ServerPath - 4

If this is the first time you are adding a project, it might show you an additional screen to create workspace. I suggest you do create a separate workspace for each of your projects, it makes life easier to track pending changes.

At the end of it, you should be all set to do check-in and check-out into TFS with Kony Studio.

Use comments to point out any mistakes or suggest enhancements…